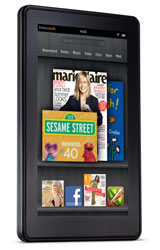
When it comes to reading ebooks, the Kindle Fire is a lot different than other Kindles. For one, the Kindle Fire automatically sequesters sideloaded ebooks and documents from Kindle Books, making them appear in a separate section for documents instead of the main ebook library list.
Thanks to Calibre, there is an easy fix for this if you want to get your sideloaded ebooks (non-Amazon ebooks) to appear in the ebook library along with all your other Kindle ebooks.
Basically, all that is required to get sideloaded ebooks to appear in the main book list is to do a quick conversion with Calibre to add the metadata tag [EBOK] to the file.
How to Get Sideloaded eBooks to Appear in eBook Library
- Import the ebook or ebooks into Calibre that you want to have appear in the Kindle Fire’s ebook library (if you’re new to Calibre, here’s a getting started guide).
- Select the ebook(s) and then click the “Convert books” tab to begin the conversion process.
- Make sure the Output Format in the upper right is MOBI. Then click the “MOBI Output” button.
- In the section where it says “Personal Doc tag”, remove the [PDOC] tag and replace it with [EBOK]. It needs to appear exactly like that, with capital letters and brackets.
- Hit “OK” to convert.
- Once the ebooks are finished converting, you can send them to the Kindle Fire with Calibre’s “send to device” feature by plugging the Kindle Fire into your computer with a USB cable.
That’s it! Just change the personal documents tag to [EBOK] and now your sideloaded ebooks will appear in the main ebook list instead of the personal document section. The only downside is that you have to use a USB cable to transfer the files. Changing the tag and sending them with Send to Kindle app or via email doesn’t work—they will still appear in the document section if you do that.


Open Calibre, Preferences, under Conversions, click Output Options, click Mobi Output. Change to [EBOK], click Apply. Close Calibre and Re open Calibre. Now when converting to Mobi, it will automatically put [EBOK] so you don’t have to change it every time.
Thanks for the tip, Lloyd!
Wow. Thanks! But one further question: What does the Personal Doc tag look like in the .opf file?
I tried EBOK
but that didn’t work.
(I’m creating .MOBI files for the Fire using Kindlegen but am mostly using a template for the opf file.)
oops. all my angle brackets were edited out: the above should read
I tried < dc:kindle_pdoc > EBOK </dc:kindle_pdoc >